
One of the first things we wanted to improve, when we moved into our house, last July, was the front door and the sidelight windows on either side of it. The door itself was in fairly good condition, but it had not been maintained as well as it could have been. We thought that it would look much better if we painted the exterior of the door grey, to match the new exterior trim colour scheme, and paint the interior of the door white, to match the new woodwork colour. My partner, Glen, enlisted his daughters to help him paint the front door. I did the final coat of grey paint. Glen also replaced the doorknob and the lock with brass ones, which match the old door knocker. We also got rid of an ill-fitting and ugly black screen door, to be able to see the lovely grey door better. We are very happy with the way the front door turned out.

As for the sidelight windows, they were clear glass and had a pair of off-white curtains strung up, rather haphazardly, across the top of the door frame. We were getting tired of the curtains getting caught in the door, whenever we were coming and going. So, of course, I looked for inspiration on Pinterest. When I saw the gorgeous frosted pattern on the sidelight windows of this pin, I knew that was just the kind of thing I wanted to do on our sidelight windows. I’m not a huge fan of solid frosted windows on sidelights. I wanted something we could still see out of, yet would give us a lot of privacy, and let in plenty of light. This idea was the perfect solution.

To begin, I read the tips on Wayward Girls’ Crafts, and then followed the link to Seventh House on the Left, to get the instructions and template for this frosted window project. I would say that this project is at a medium level in terms of difficulty. If you are very detail-oriented and crafty, then this project could be right for you. We absolutely love how our front door and sidelight windows look now. It has really transformed our sidelight windows into something special. I love how our entryway glows with light, and how unique it looks.


The pattern was from a tile, originally. It’s a bit tricky. There is very little room for error, when lining up the shapes. You need to allow 1/4″ or so between shapes, or the whole pattern will get messed up. It was very time-consuming to cut all the shapes out, but totally worth it! I used frosted stick-on window film, but you could use the cling-on type, if you can find it. That would be easier to remove (ideal for renters).
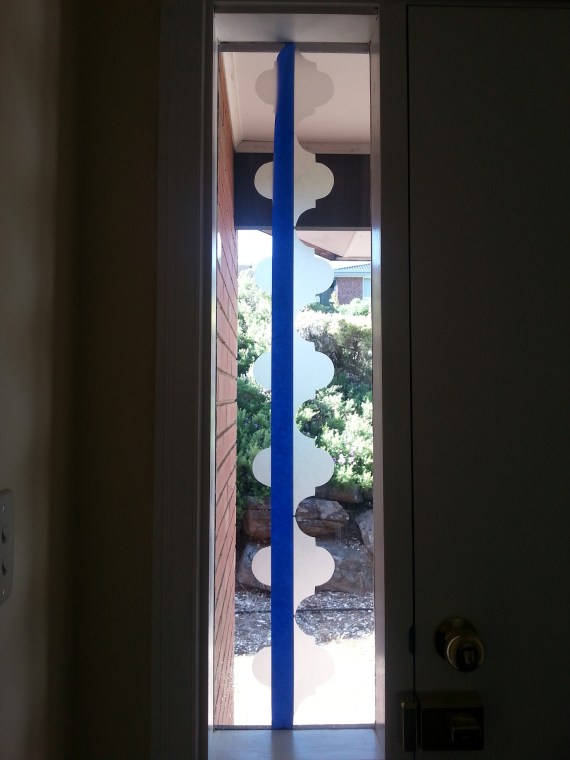
A tip, for anyone trying the stick-on kind, like I did: use a couple drops of baby shampoo mixed with water in a spray bottle and spray the glass before applying each shape (after thoroughly cleaning the glass). This helps to let the shape slide a little (which helps you to get it in the right spot) and not bubble as much. It is a bit tricky to apply, but it gets easier, with practice. Glen was my right-hand man, when installing the shapes. He brought the shapes and unpeeled the backing for me. We used blue painter’s tape on one end of each shape, and sticky tape (aka “Scotch” tape) on the other end, and that helped to peel the backing off, without ripping the frosted plastic. I used an Exacto blade to trim the edges. I cut out partial shapes for the edges and corners, to fill in the gaps. To begin the installation, we used a strip of painter’s tape on the outside of the window section, down the centres, as a guide, while lining up the first few shapes. That way, we knew the pattern would line up straight down the middle of each window section.

I highly recommend this project to anyone looking to add privacy in a stylish and special way to sidelight windows, or any other windows in your home. You might even find another tile pattern to inspire you, to do a different shape. I can imagine many possible variations on this idea. It’s a gorgeous, inexpensive DIY project that really makes a difference in the home.

All written content and photos are Copyright Kimberly Sequoia 2017 for a delicious moment.
